|
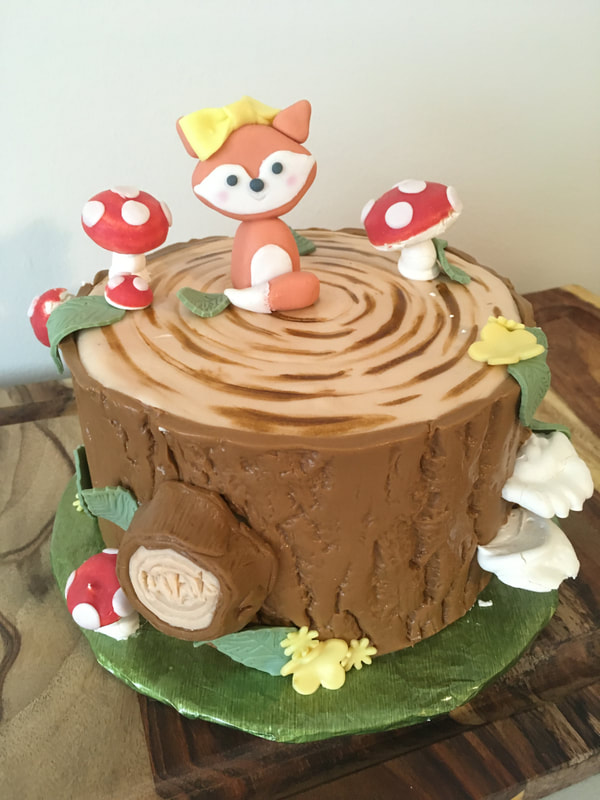
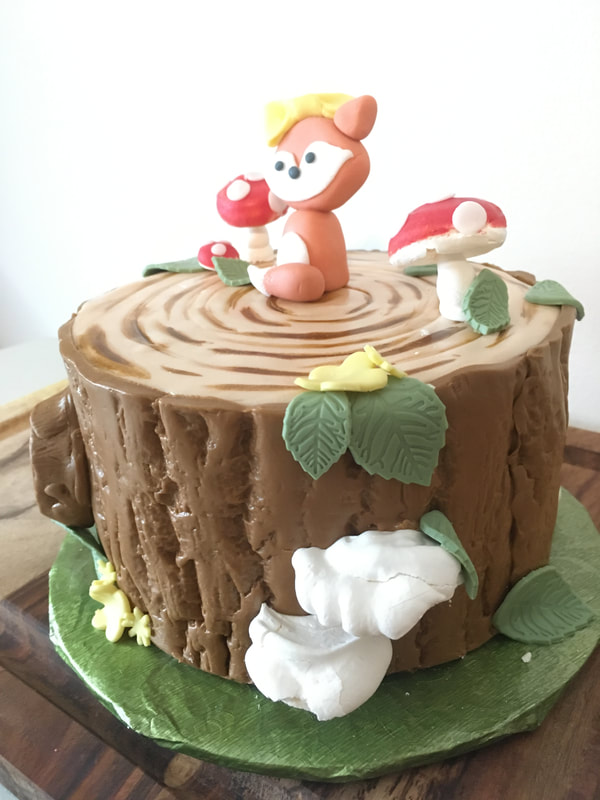
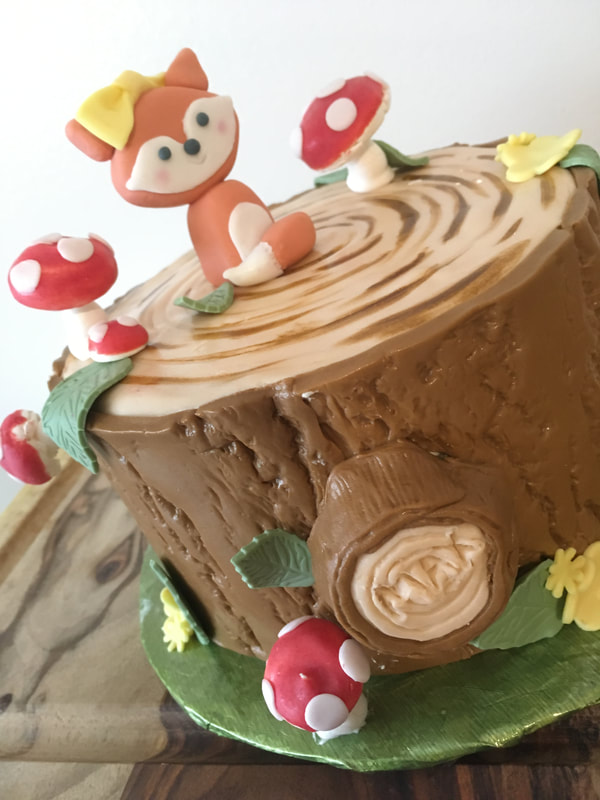
What could possibly be cuter for a baby shower theme than woodland critters?! This cake was so much fun to do, and really shows how much my fondant work has improved!
The cake itself was a lemon cake with a homemade blueberry compote and Swiss meringue buttercream filling. I used applesauce instead of buttermilk and it turned out beautifully moist. I used a silicon textured mat to create the bark look around the outside, and various size round cake pans to score the top of the "stump" before tracing them with brown gel food color to make the rings. I used textured stamps to cut out the leaves and flowers, but the fox I sculpted freehand. It took me a few times to get her just right! The mushrooms are plain meringues, and for the red caps I dipped them in red colored white chocolate and cut out fondant circles for the spots. Meringue mushrooms are actually quite easy to make, but don't forget to make extra in case you break a few! It was so exciting to see this cake come together, and really gratifying to see that all of the practice is paying off! Recipe Link: https://sallysbakingaddiction.com/lemon-blueberry-layer-cake/ - I substituted applesauce for buttermilk, and used
0 Comments
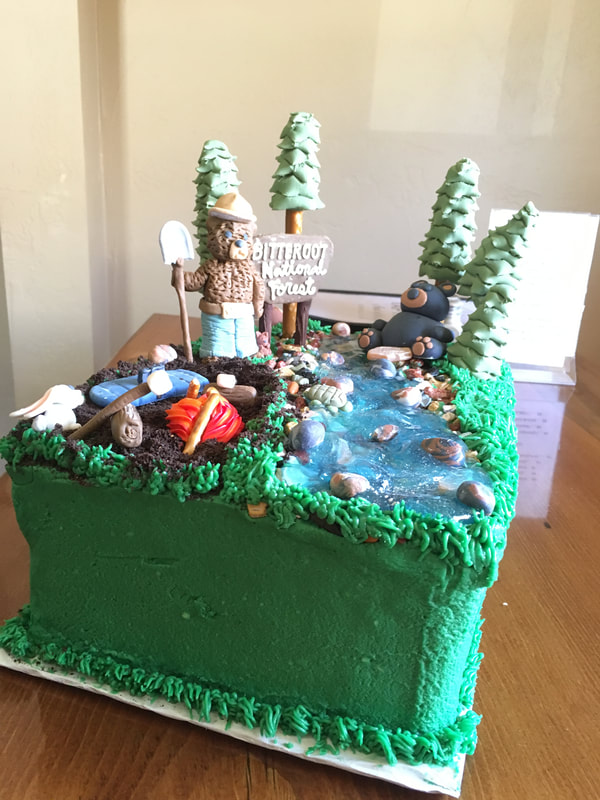
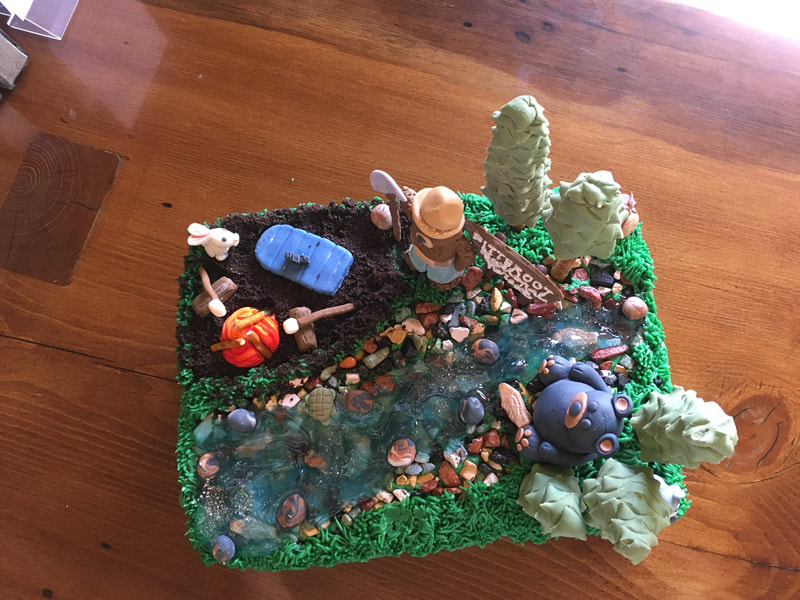
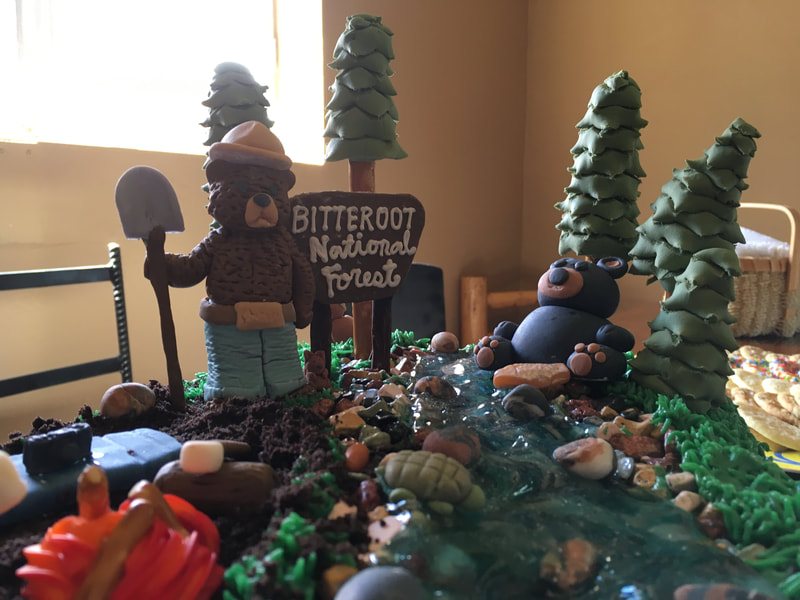
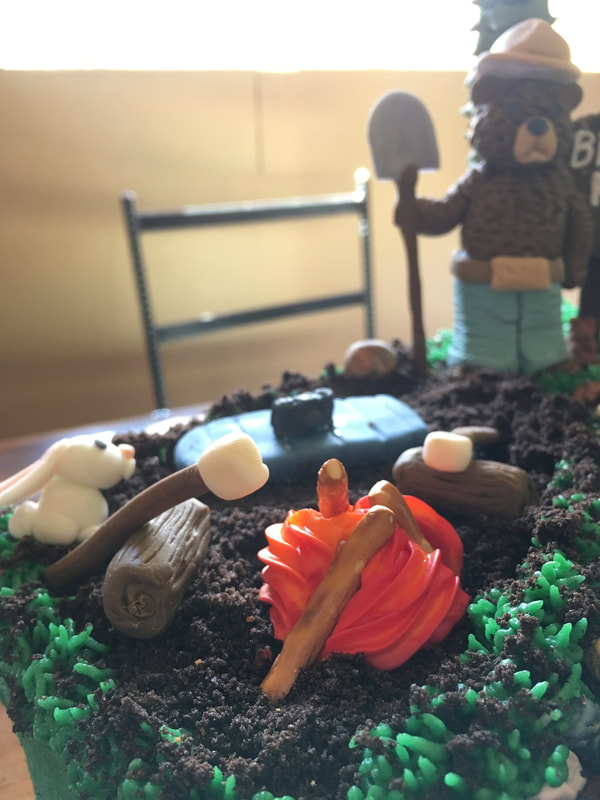
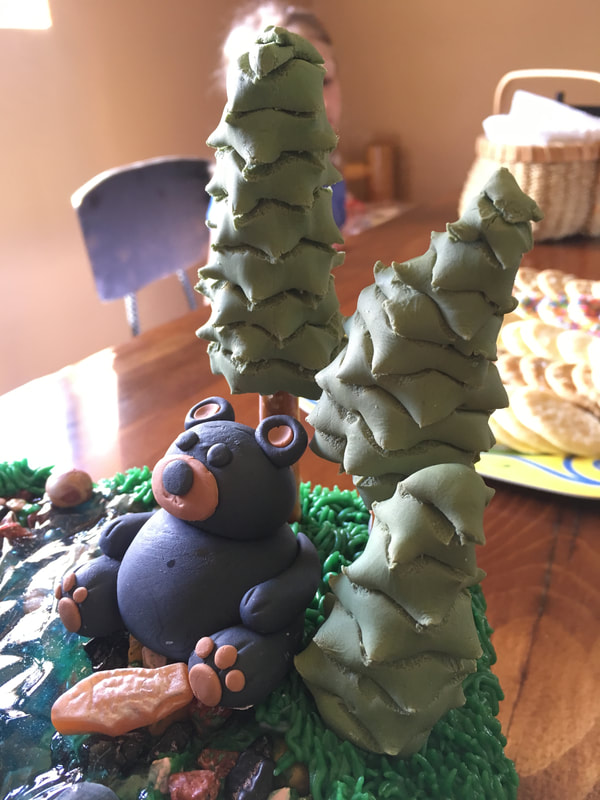
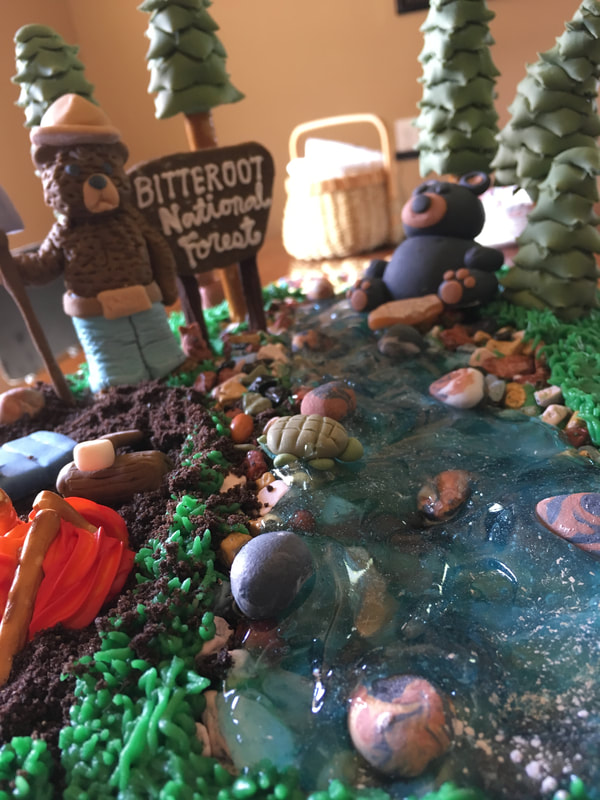
Campfires and rabbits and Smokey the Bear, oh my!
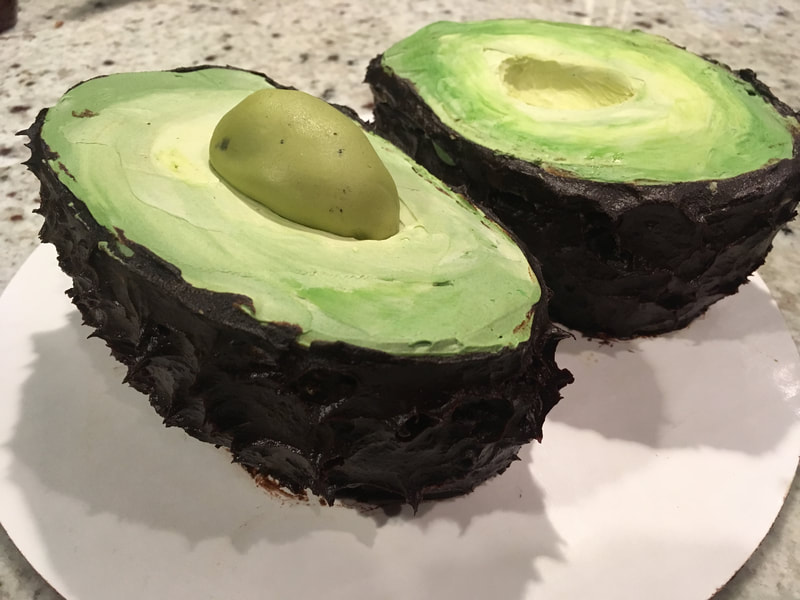
This is probably one of my favorites cakes that I've ever done! My dad recently retired after 39 years in the US Forest Service and he's had a lot of cool jobs over the years, including being a park ranger and a wildlife biologist. It was definitely a challenge to try and capture all of that on one cake! For the cake itself, it was both white and chocolate cake. I made the layers to look like the different layers of soil, so the dark chocolate layer was on top to represent the surface layer, then a milk chocolate layer for the top soil, a beige colored vanilla layer for the subsoil, and a white vanilla layer with Oreo chunks to represent the bedrock. As I've not done a lot of fondant sculpting before, all of the decorations were definitely a challenge! I had a lot of help from my wonderful bakery co-workers, who crafted all of the animals except Smokey the Bear. It took me 3 times as long to make him, but thank goodness he turned out recognizable! For the river rocks I used chocolate rocks that I found at Lolli and Pops. I also used Swedish fish painted with edible silver lustre dust, and I tinted clear piping gel blue to make the river. The biggest challenge with this cake? Transportation! We were only flying in to Montana for the weekend, so most of the cake had to be assembled ahead of time. After McGyver-ing a Styrofoam cooler so the cake would fit (and not slide!) we packed it up in the 4-seater airplane for a 3-hour flight over the Rockies! By some miracle it made it completely intact, and I assembled the decorations and river moments before the retirement party. Phew!! So, avocados. The super-food that millennial's are putting on anything and everything. But they're not just a hipster food fad, avocados are incredibly versatile for healthy fat substitutions in baking!
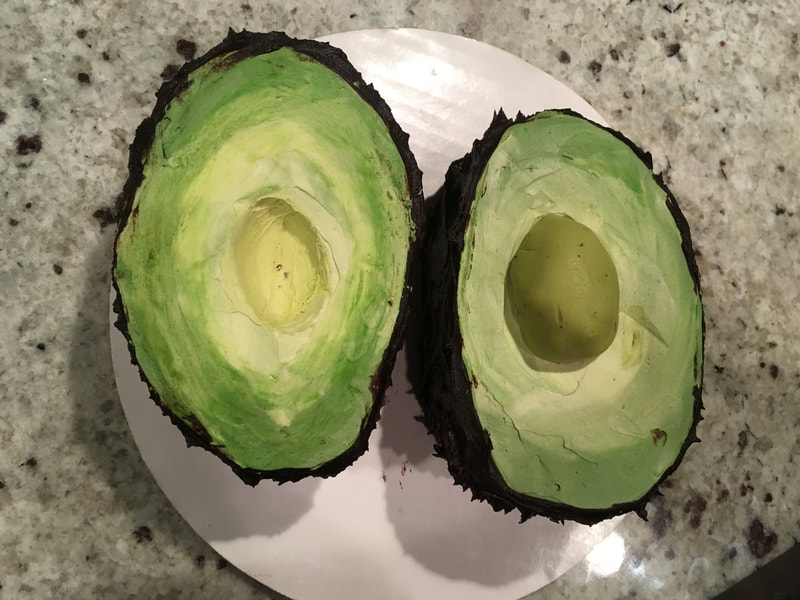
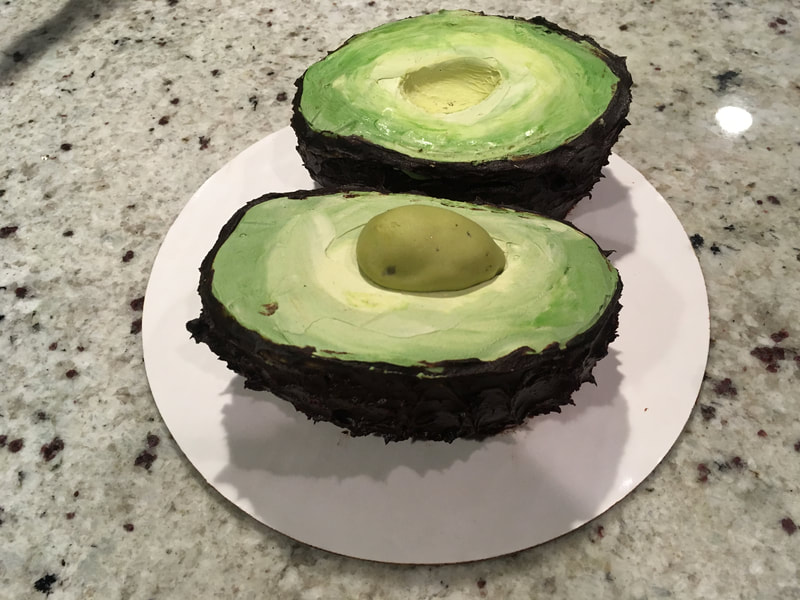
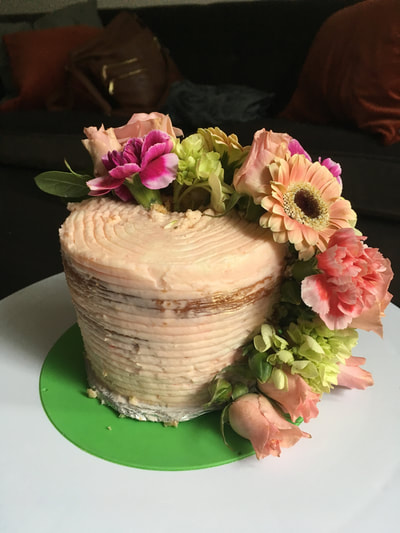
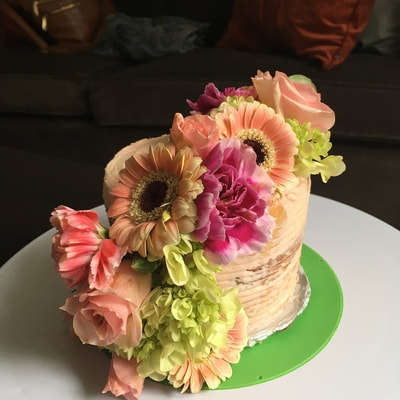
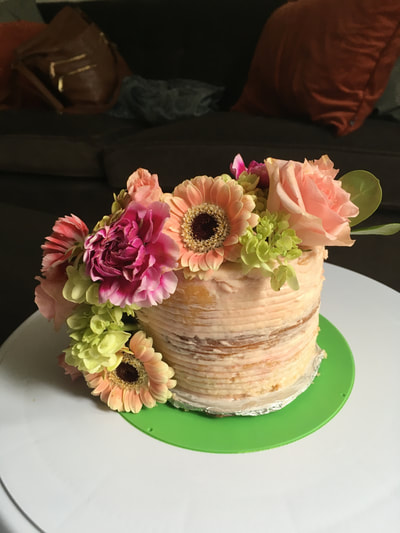
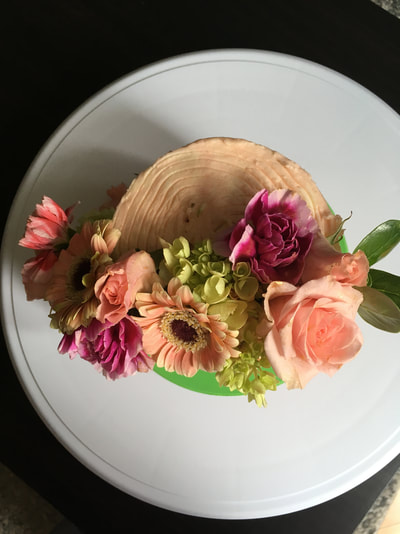
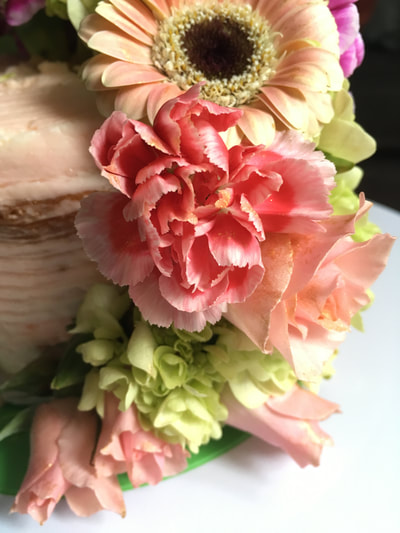
My brother and sister-in-law eat very clean and don't really eat sweets, so for her birthday I knew I had to find a healthier alternative to traditional cake. After a bit of googling, I found a recipe that used raw sweet potato instead of flour, avocado in place of butter or oil, and dates and a little maple syrup as a natural sweetener. It was definitely a very dense cake, almost fudge like in consistency, which is usually the sacrifice you make when using fruits and vegetables as healthier alternative in baking. The flavor was still amazing (I used dutch processed cocoa powder) and the avocado made it perfectly moist. It was a big hit with my family! The frosting was equally as healthy and tasty, made with mashed sweet potato,dates, avocado and cocoa powder. I ended up adding an extra whole avocado to make it a bit creamier and stiffer for decorating, and it worked beautifully! I did have to cheat a tiny bit and use Italian meringue buttercream to make the green flesh part of the avocado, but it was a very thin layer. Overall, this cake turned out wonderfully and tasted great as well. For a long time there was a lot of misconception that "healthy" baked goods tasted terrible, but that certainly isn't true! There are many healthy substitutes you can use in baking that taste amazing, so don't be afraid to test them out! Recipe link: https://paleoglutenfree.com/recipes/best-paleo-avocado-chocolate-cake/ I finally did a naked cake! A friend requested a smash cake for a photo shoot and the naked wedding cakes were the inspiration. I went with a simple vanilla cake with some leftover italian meringue buttercream from a different cake (never waste a drop!). For some reason, the nice brown edge crumbled off the edges of my cake, which is what I needed for that nice "naked" look". I layered the frosting around the edges and had to very strategically scrape down in only certain areas, so I got less of the exposed cake than I would have liked. I decided to add some grooves to help hide how little "nakedness" there was. I used fresh flowers (Trader Joe's has the best!) and stuck them directly into the cake. The last step was to brush some of the petals with gold lustre dust for a bit of sparkle!
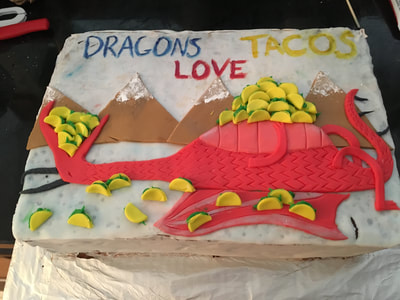
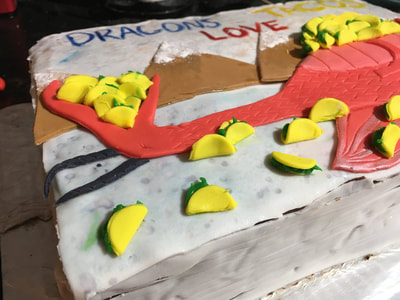
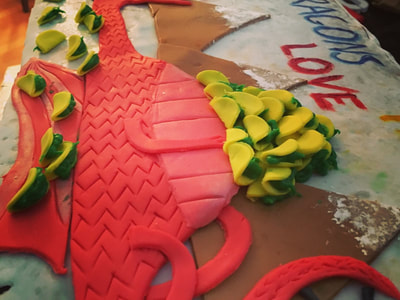
I recently had a friend commission a cake for her daughter's birthday and the theme was tacos! More specifically, it was the children's book "Dragons Love Tacos"! At first I thought maybe I would be super ambitious and do a sculpted cake, but lack of time (and confidence) got the better of me). I decided to just replicate the book cover, which still held a lot of challenging fondant work. The cake itself is pure chocolate (for 5 year old palates) and turned out a bit denser than I wanted, but still tasted great! Originally I wanted the edges to look like the pages of a book, so I put the top and sides on separately. Not the best idea because it was really hard to get clean lines and make sure the chocolate frosting was completely hidden. I also rolled my fondant too thin (because I don't like to taste too much of it) and ended up with several tears when I indented the lines for the pages. I used a tiny bit of gel dye mixed with water to "paint" the top before putting all the other fondant pieces on. I had to free-hand the dragon (terrifying!) and just used the end of my candy thermometer cover to cut out the circles for the tacos. I used store-bought writing icing for the "lettuce' in the tacos and then use straight gel color to paint the title. A little powdered sugar gave the mountains a little snow and voila! It came out a bit rougher than I'd hoped, but the birthday girl didn't seem to mind!
Two blog posts from me in the same month?! Unheard of! But I recently made a birthday cake for a friend, and was pretty pleased with how it came out! I wanted to try my hand at an ombre cake, inside and out. But don't let the pink fool you about the flavor! It's a lemon cake with cream and homemade lemon curd filling and vanilla Italian meringue buttercream! I started with my go-to white cake and just added fresh lemon juice for the flavor. The cake ended up being quite dense because, silly me, I forgot to reduce the amount of milk in the recipe because of the half cup of fresh lemon juice I added. I don't like to use lemon extract because it doesn't taste quite right to me. However, the shades of pink came out quite nicely! After that came the filling and stacking the layers. I didn't cut the bottom layer quite even, and as I stacked them they slide to one side quite a bit! I crumb coated it and put large skewers in the cake to keep it from sliding while it chilled. The next bit was a bit difficult because as much as prefer Italian meringue, it's stiff texture didn't lend itself to blending the colors very easily. I wanted a little more decoration, so I added some chunky sugar crystals, edible pearls and non pareils to give it some sparkle! I used tweezers to place the pearls. Added some cupcake toppers to the top and voila! Despite some technical difficulties, I'm pretty pleased with how it turned out! Stay tuned for my next project; a taco cake!
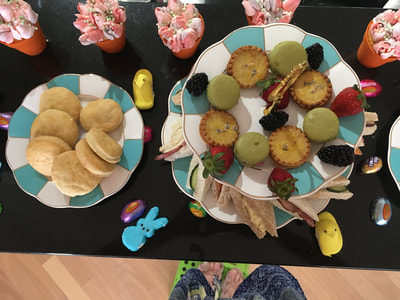
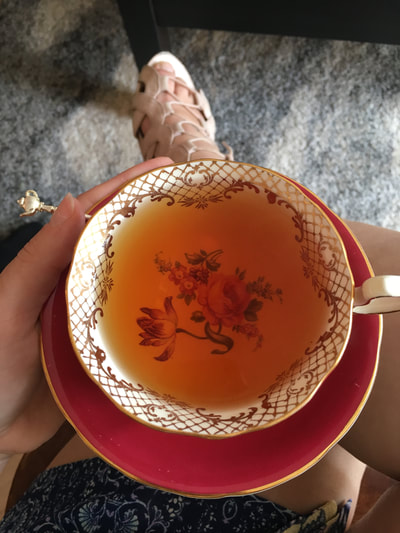
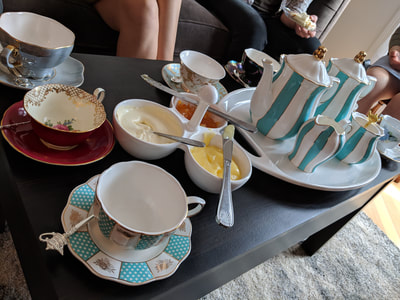
Ok ok....I fully admit I've been completely awful at keeping up with blog posts. And it's not because I haven't been baking! The year kicked off crazy busy and when I finally took a breath, it was already April! So it seemed like the perfect time to slow down for a cup of tea....High Tea in fact! Thanks to my Aunt Debbie who took me to my first high tea in London, it has become one of my favorite things to do! Finger sandwiches, scones with clotted cream, mini desserts and endless amounts of tea! I've talked about putting one together for ages, and I finally got my butt in gear!
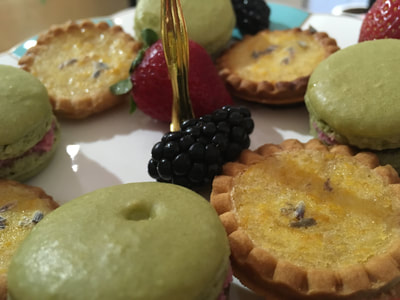
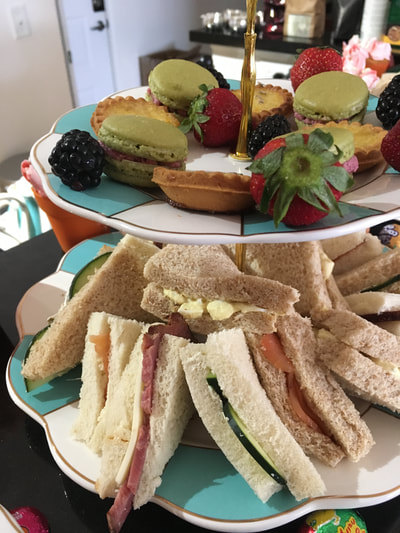
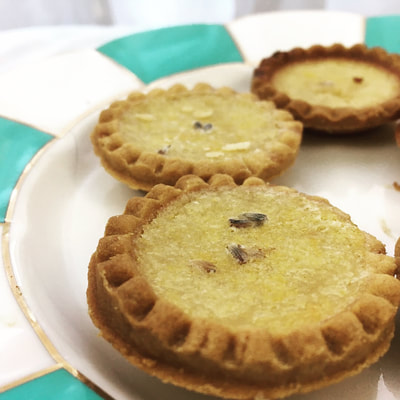
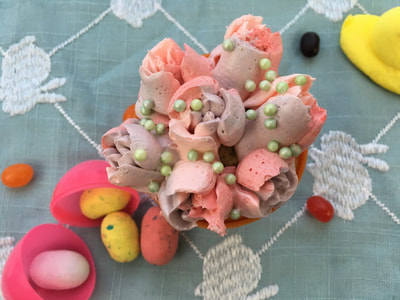
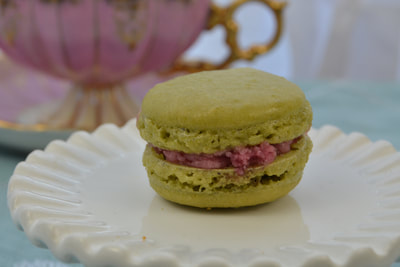
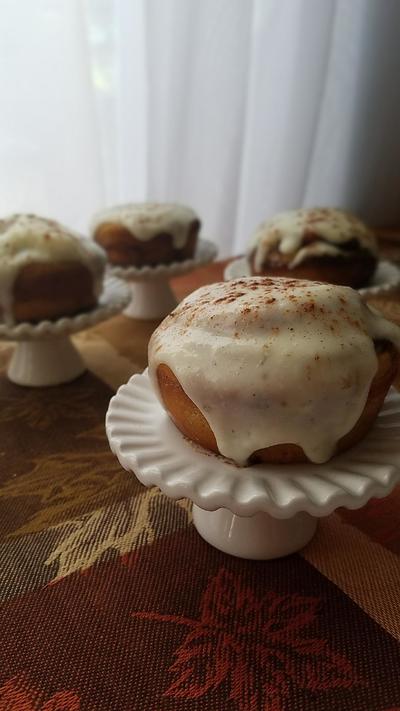
I stayed pretty traditional with my finger sandwiches; smoked salmon and Boursin goat cheese, cucumber and chive cream cheese, egg salad, and a ham and provolone. I also stuck with some plain scones, Mary Berry's recipe in fact! However, I completely forgot that her recipe uses self raising flour (which I didn't have) so mine looked a bit like fat pancakes. I served them with homemade lemon curd and clotted cream (from Dekalb Farmers Market). For my desserts, I just had to use some springtime flavors! The first dessert was a mini lemon lavender tart! I will confess, I didn't make the tart pastry. I tried two different shortcuts; cutting out circles of pre-made pie crust and pressing it into my tart pan, and bought pre-baked tart shells. While I preferred the thinness and taste of the pie crust, they of course didn't look as neat as the bought shells (the ones in the picture). I used an easy lemon filling recipe I got from a cooking class as Sur la Table, and it was perfectly lemony and not too sweet! The cupcakes were rose with pistachio mousse filling and rose Italian Meringue Buttercream! I have made these before and I just love the flavor combo! I use a basic fluffy white cake recipe and use rose extract instead of vanilla. I always forget to write down which pistachio mousse recipe I use, but the most important part is using real pistachio's and not pudding mix. It comes out fluffy and creamy with lovely nutty flavor to round out the rose! For the frosting, I always use an Italian meringue buttercream because it's less sickly sweet, and also holds shape really well. With all the floral flavors, I thought it was only appropriate to decorate my potted cupcakes with flowers! It also gave me an excuse to use Russian piping tips, which I definitely need more practice with. And because that wasn't complicated enough, I thought I'd also try using my tri-color adapter for the first time. Needless to say, the kitchen counter was a frosting Picasso! But overall, I think they turned out alright! Last but not least, I had to try my hand at macarons. And since it's high tea, why not add tea to those too! I made matcha macaron shells w/ blackberry buttercream. The shells were a little tricky because I had trouble getting them to dry out enough for form a skin. I had the throw the first batch away because they were still too wet after baking, something my flabbergasted my French roommate! Initially the filling was supposed to be raspberry, but there were no raspberries when I went to the store. Anyway, why follow the recipe when experimenting is much more fun! All in all, I think everything turned out pretty well! It was fun to try my hand at some new things, and make a mess along the way. It was even better to just sit down and have a cup of tea with a few friends! Fall is definitely my favorite time of year for baking. It's all about the pumpkin and warm, fragrant spices! Every year I'm always on the search for new pumpkin recipes, but I still have a few classics I just can't pass up. This weekend I decided to kick off my fall baking by testing some new recipes, but with a few twists! I started with a Pinterest recipe from Like Mother, Like Daughter* for pumpkin cinnamon rolls! I mostly stuck to the recipe for the dough, aside from doubling all of the spices and doing a second proof after slicing the rolls. When it came to the frosting, I decided to play a little bit! I love having multiple flavor profiles in my food, so I substituted ginger extract instead of vanilla. I also added a dash of lemon juice to brighten things up! The flavors came through a bit strong, so I had to add a few more ounces of cream cheese to balance it out. The ginger/lemon complimented the pumpkin and gave it a little more depth. They practically flew off the plate at work, so it seems this experiment was a success!
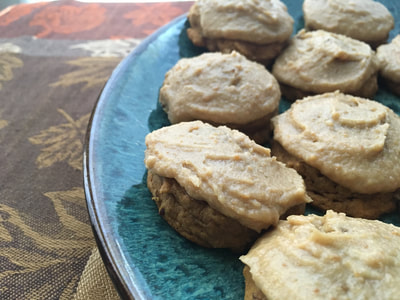
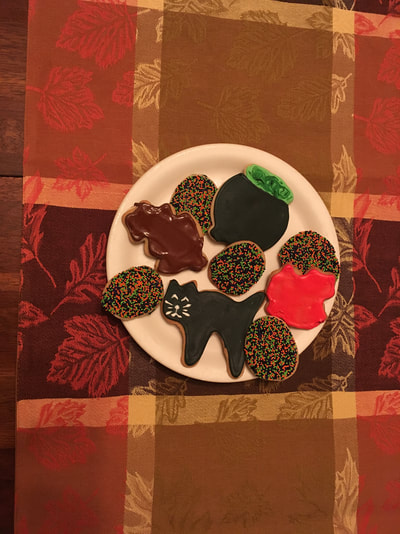
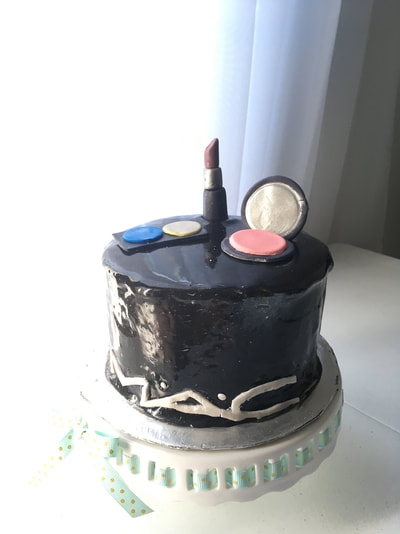
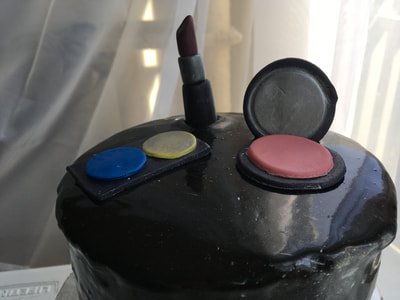
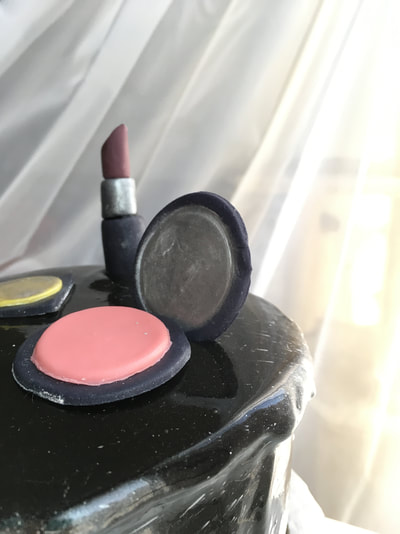
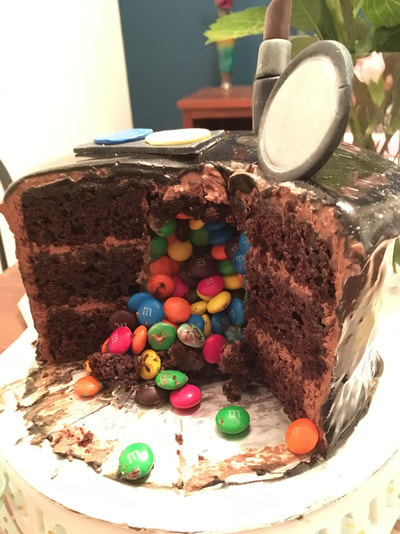
I also tried a new pumpkin pecan cookie recipe from one of my many cook books. Again, I stuck mostly to the recipe, except for doubling the spices and adding a few extra. Again, the frosting was really where I tweaked things. The recipe was just a buttercream made with brown sugar, so to add a little depth I browned the butter first. I also added a good dash of whiskey, which helps cut the sweetness and gives it a nice smokey flavor. These cookies were so moist and light, but not too sweet. The frosting is optional, but it definitely compliments the pumpkin well! They got rave reviews and definitely didn't last long! Last but not least, I made some spiced sugar cookies, mostly just to have some fun cookies! I definitely need to practice my royal icing skills a bit more! That's all for now, but there is definitely more pumpkin-y goodness to be had. Stay tuned! This post is over a month late, but it's terribly difficult to keep up without a laptop! Any-who, a friend of mine recently had a birthday and of course I wanted to make a cake! She had quite the makeup obsession, so I thought it would be a good time to try more fondant work! The cake itself was a pretty basic chocolate cake with chocolate mousse filling, but I did sneak a little surprise in the center! The big task was the decoration. I chose a MAC makeup theme, so I decided to cover the cake with a shiny mirror glaze for a nice, clean look. Making the glaze itself was actually simpler than I anticipated, it was the application that's a bit tricky. I used a fluffy chocolate mousse for a base frosting, so the mirror glaze couldn't be too warm when I put it on or the mousse would just melt. However, you still have to pour the glaze on before it cools too much or the gelatin will set. Because of that, the mousse didn't stay perfectly smooth when I began to pour/spread the glaze. In retrospect, a buttercream would definitely be a better base for mirror glaze. Aside from that, the mirror glaze smooths quite easily over the cake and gives it beautifully clean lines! After it set, I tossed a little bit of silver lustre dust on it for extra glam. The final touch was the fondant makeup and logo! I don't have specific fondant tools yet, so I made do with a paring knife and biscuit cutter to cut out the basic shapes. The logo was the difficult part! I printed it out on regular paper, cut it out and put it on top of rolled out fondant. Unfortunately my knife wasn't sharp enough and I didn't get the clean lines I was hoping for. I also should have put the logo on while it was still pliable, instead of after it dried (it broke in a few spots). After adding a little more lustre dust (and a few toothpicks to keep things upright), it actually all came together quite nicely! I'll definitely be looking for more excuses to do mirror glazes and fondant work!
My dad has always been an avid shutterbug, which resulted in a LOT of pictures of me growing up. Whether it was hiking or just baking Christmas cookies, my dad mad sure my younger years were well documented. Now that I've grown up and moved away we don't see each other as much, so those photos are few and far between. So when I decided to make severely alcoholic cupcakes (Irish Car Bombs, forgive the name!), it seemed like the perfect opportunity to show him what I was up to! I thought I should show him what an accomplished young woman/baker I was becoming. So naturally, I made it look like I was drunk off my ass whilst baking. Hey, my dad always preferred documenting the embarrassing moments anyways! Hope I'm making you proud, Dad! |
AuthorEmily Steele Archives
November 2019
Categories |

 RSS Feed
